
FIRST: We’re using SSDTDatabase Project and we introduced an error in an earlier post; resolve this error, delete or use the correct column name in the view, to continue.
Typically, debugging is for a developer to examine, study, learn, and, obviously, develop and debug the database in an environment separate and independent from other developers. This target debug database is the one we saw in the Database Project Properties | Debug | Target Connection String setting.
Tip: The debug database may reside on a networked SQL Instance.
When publishing, the target database is now shared and accessible by other developers and applications on a SQL Server instance. During this exercise we’ll publish to two instances simulating test and production environments: one on a local network and the other on Azure.
- Successfully Build the Database
- Create a Publish Profile
- Publish from the Output Script
- Publish to Second SQL Server
Successfully Build the Database
Publishing a database requires no errors. To check and validate no errors exist well 1) check the Error List pane, and 2) verify by building the database.
Check for Errors
Most of the time you’ll be resolving object errors (DDL Errors) as the database is developed. It is good practice to review the Error List.
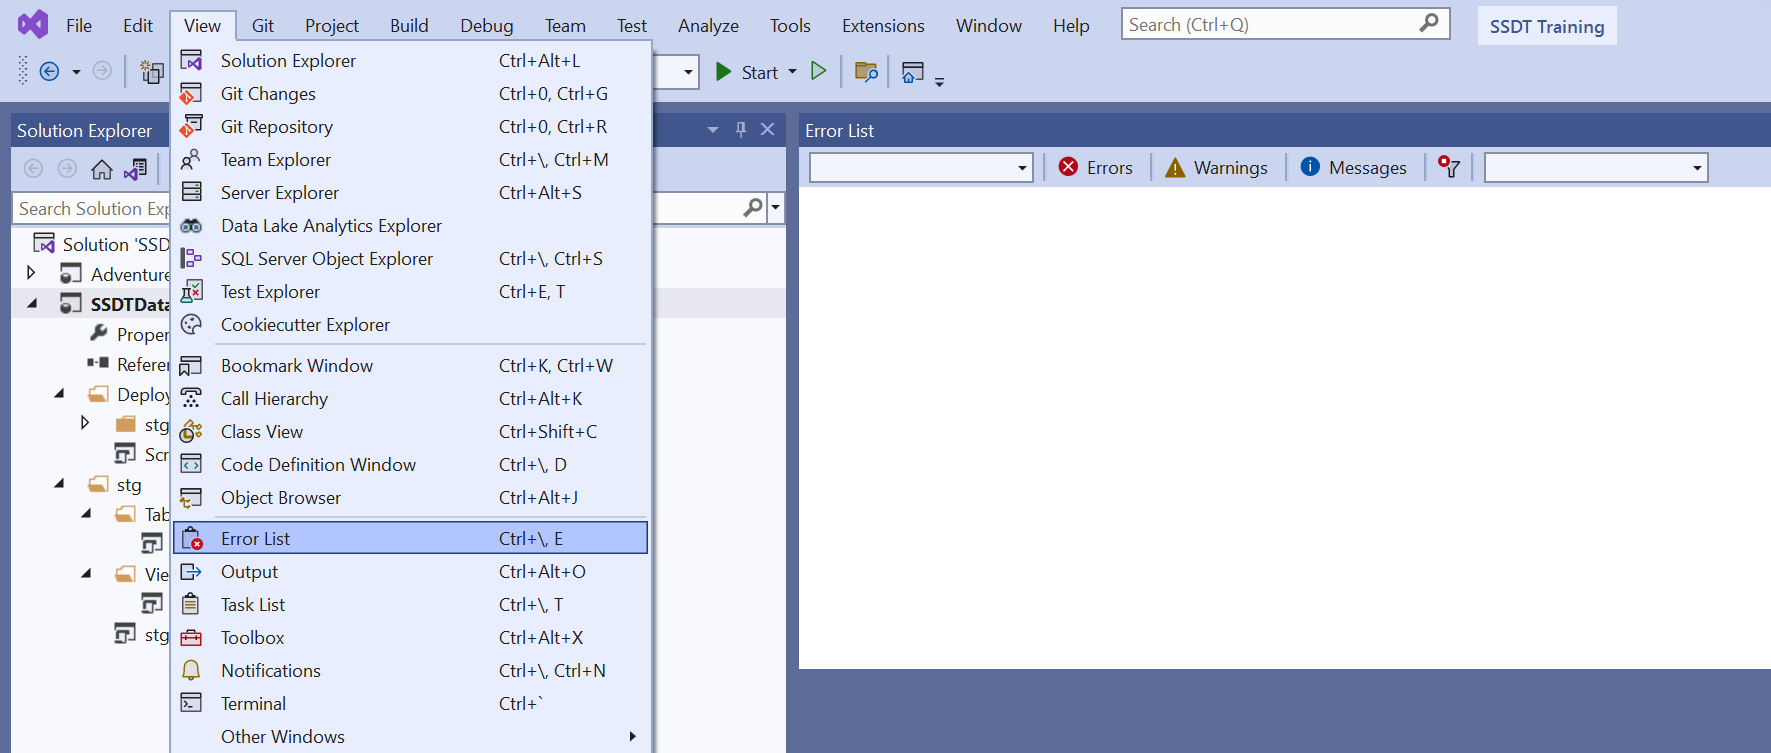
- Open Error List pane: View > Error List
- Look to see no errors exist
- Also review any Warnings or Messages…
- Prefect, no errors!
Build the Database
Now we’ll build the database, review the output, and also recheck the Error List:
- Right click the project SSDTDatabase
- Select Build
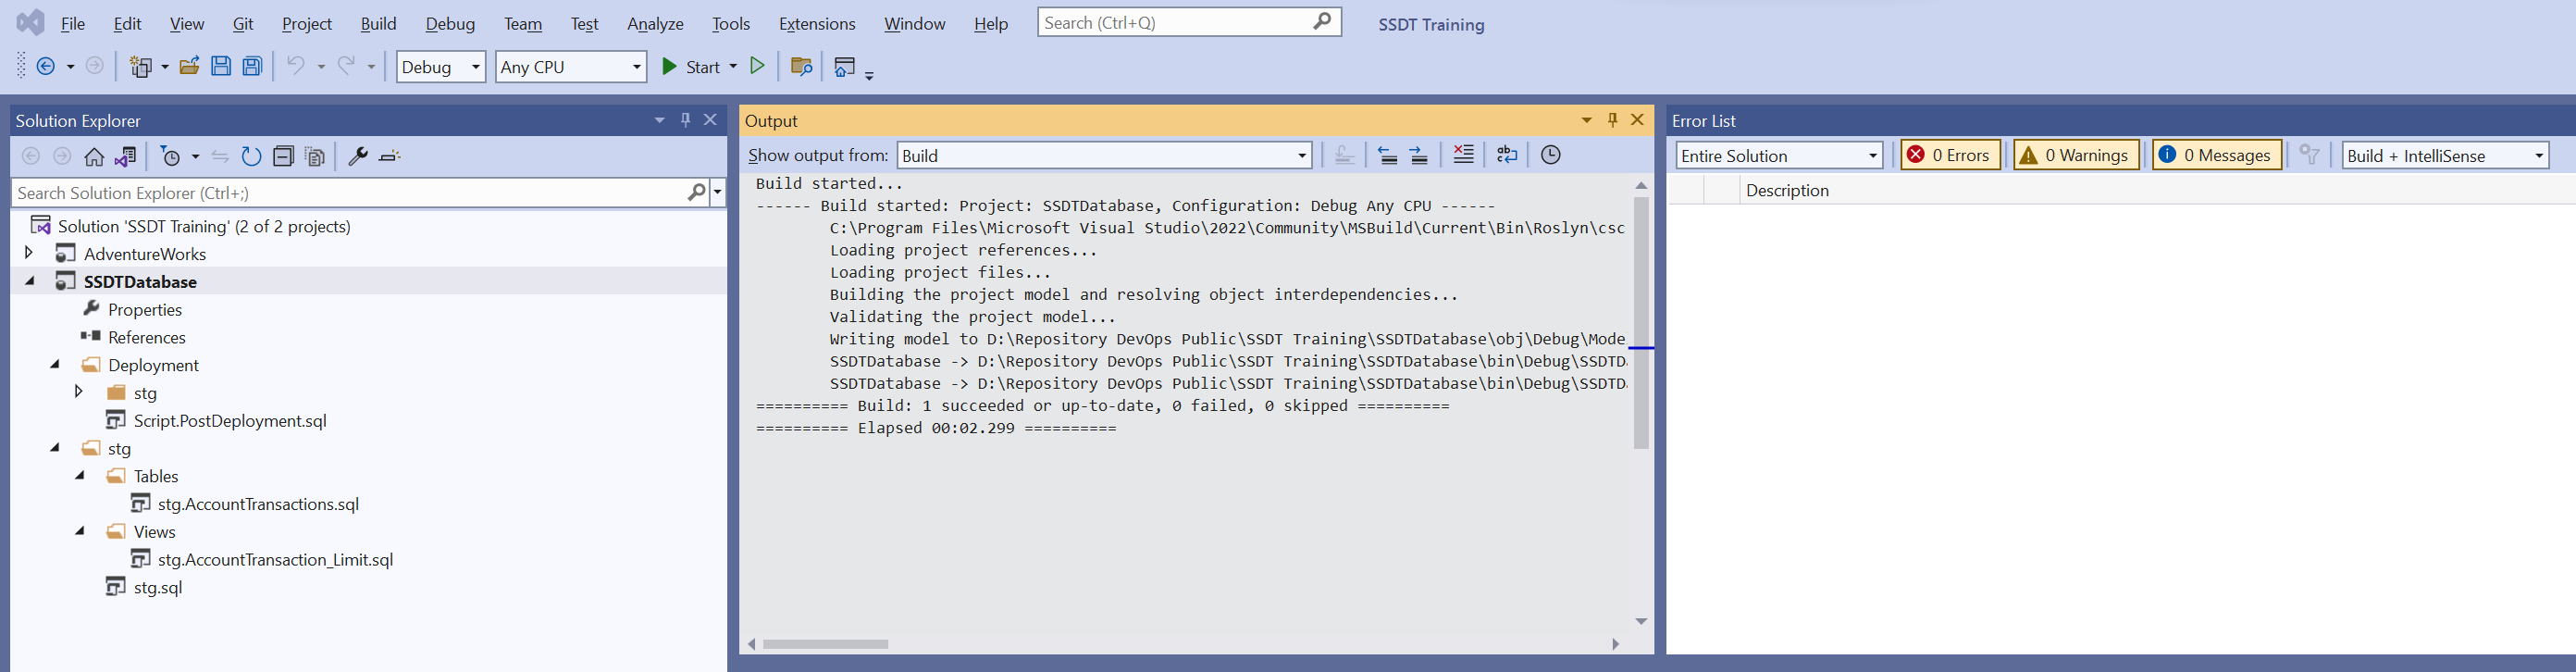
- The Output window will open automatically and show the build steps
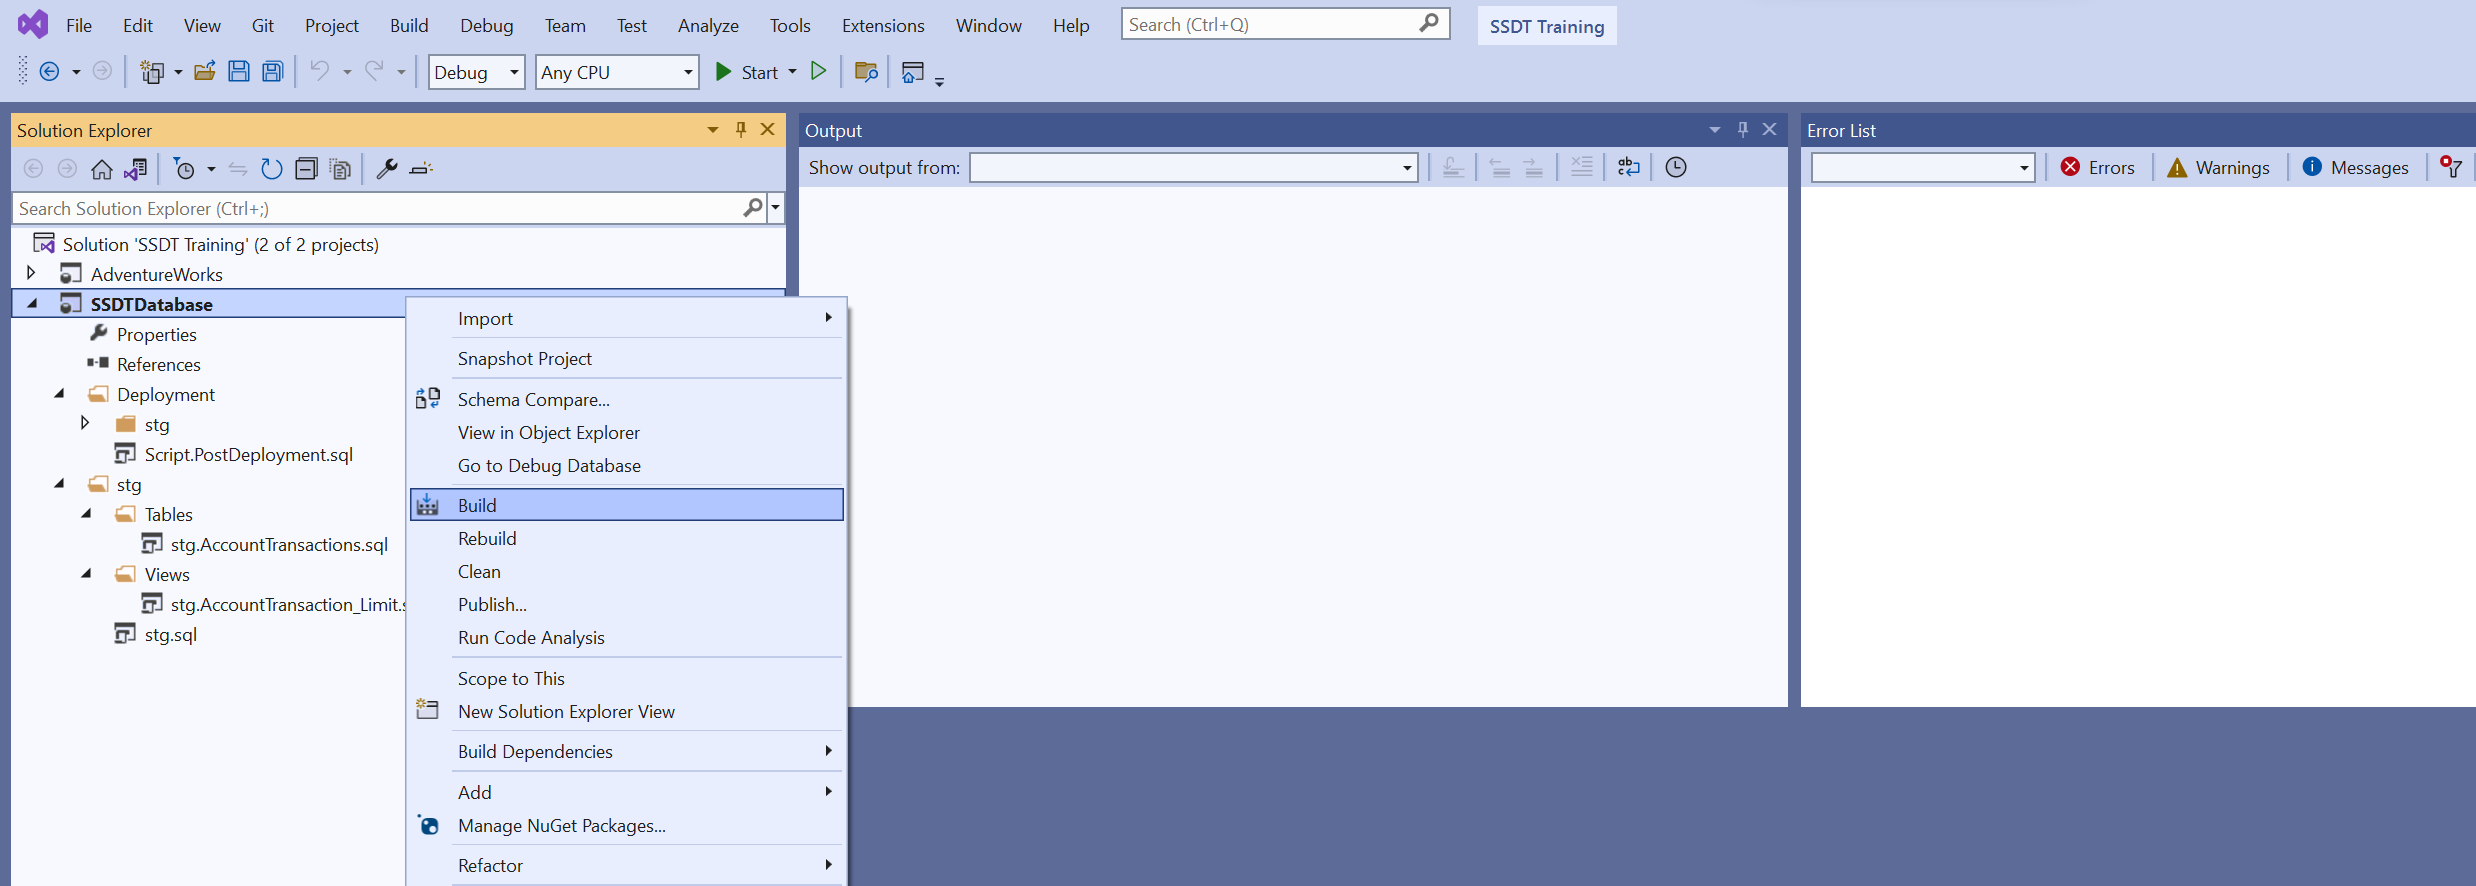
- A successful build returns a positive message and no errors are listed in the error list:
========= Build: 1 succeeded or up-to-date, 0 failed, 0 skipped =========
Create a Publish Profile
Once the database successfully builds, it is ready for and can be published. We’ll begin with some organizational tasks followed by creating and publishing the database on a server.
- If necessary, create a New Folder in the SSDTDatabase project and name it Deployment
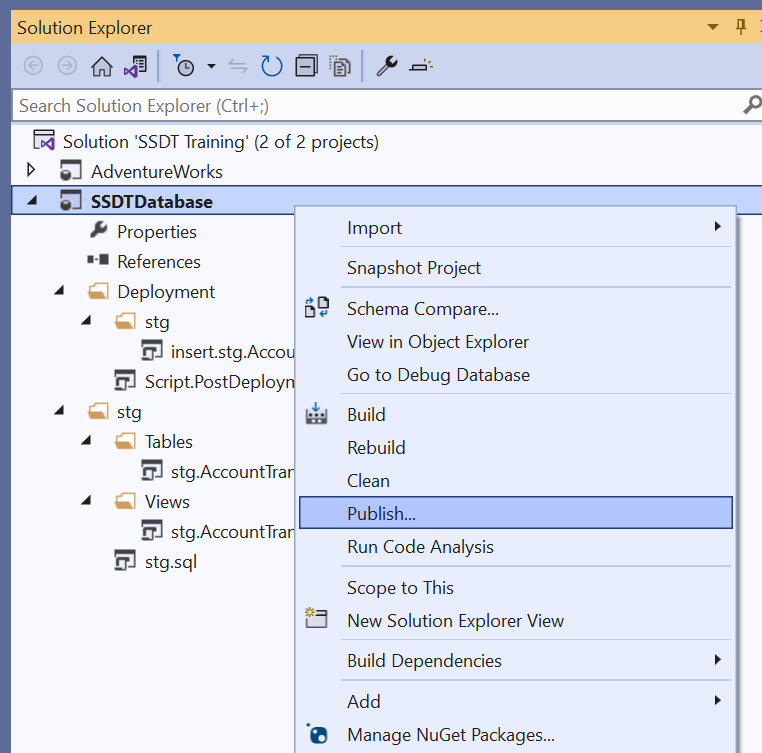
- Right click the project SSDTDatabase
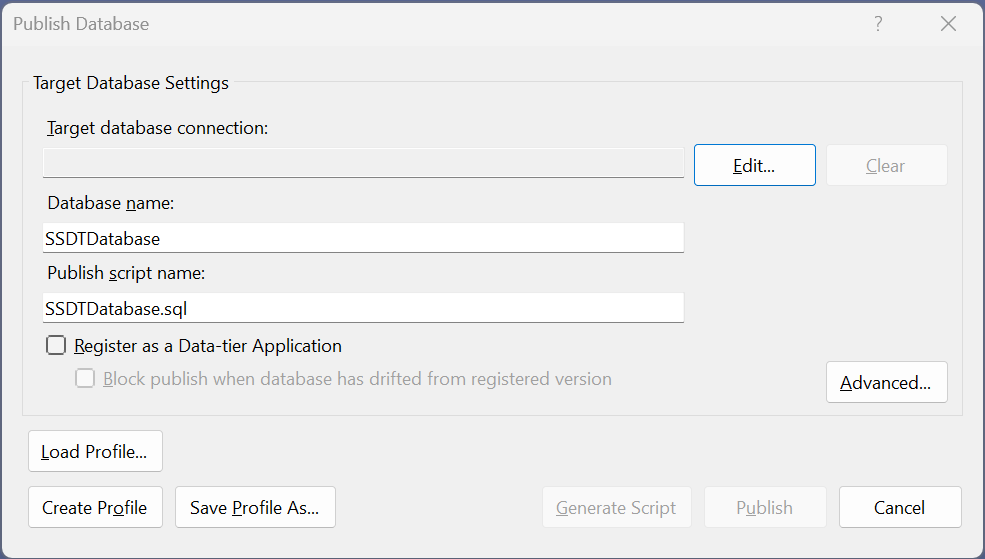
- Select Publish…
- A new window opens with an empty database connection
- Click Edit…
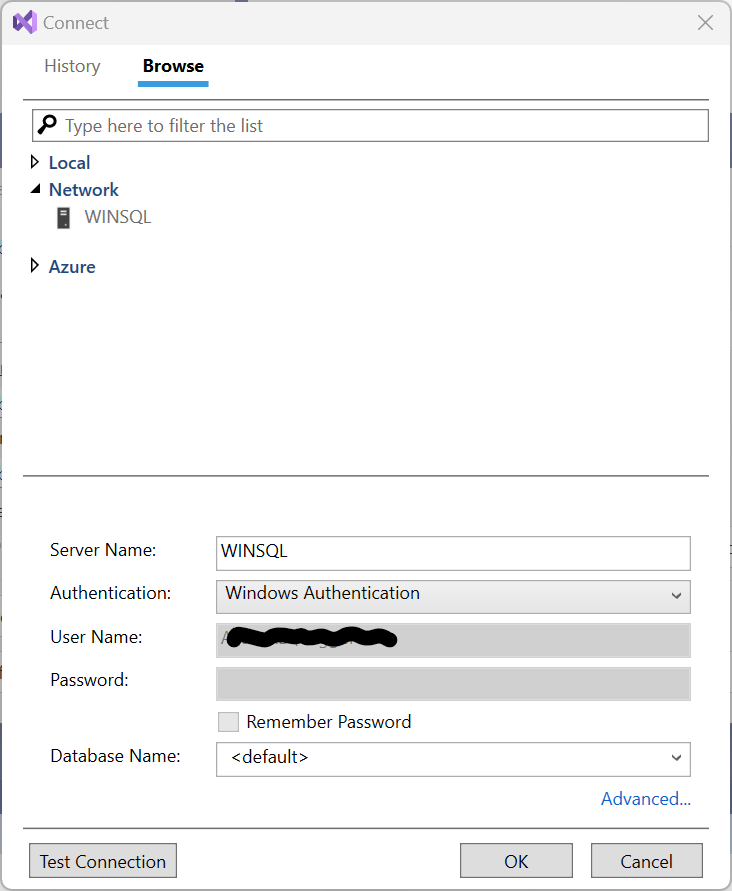
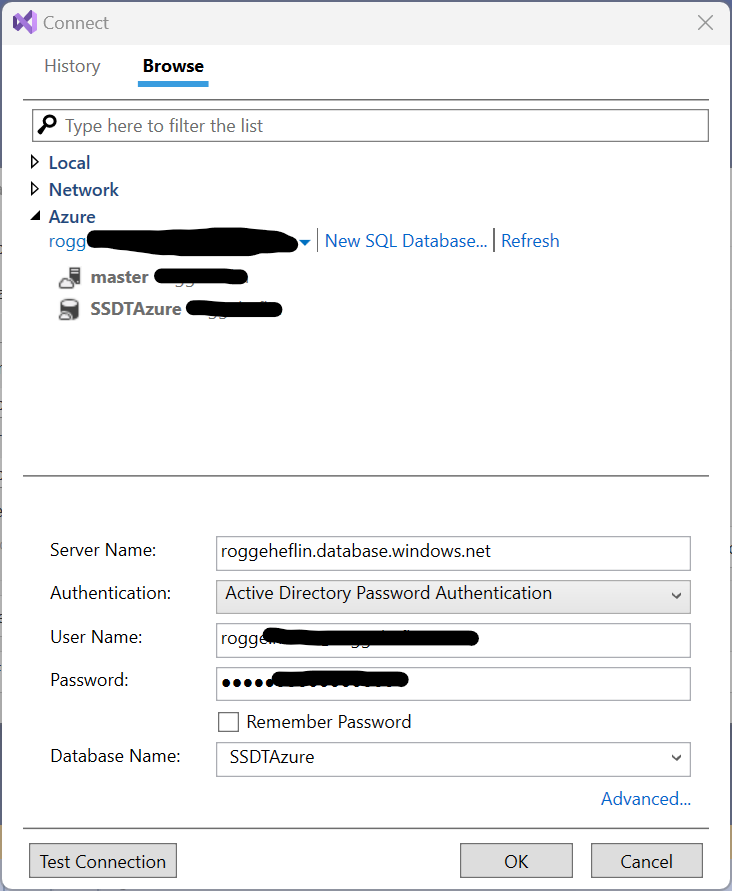
- Select the Browse tab
- Expand Network
- Select your SQL Server – Mine is named WINSQL
- If your SQL Servers do not broadcast their availability…
- Manually enter the connection details
- Get SQL DBAs to show the servers
- Change jobs
- Enter the Authentication method and enter any credentials details
- The user must have CREATE DATABASE privileges
- Leave Database Name: set to <default>
- Verify the credentials by clicking Test Connection
- Click OK
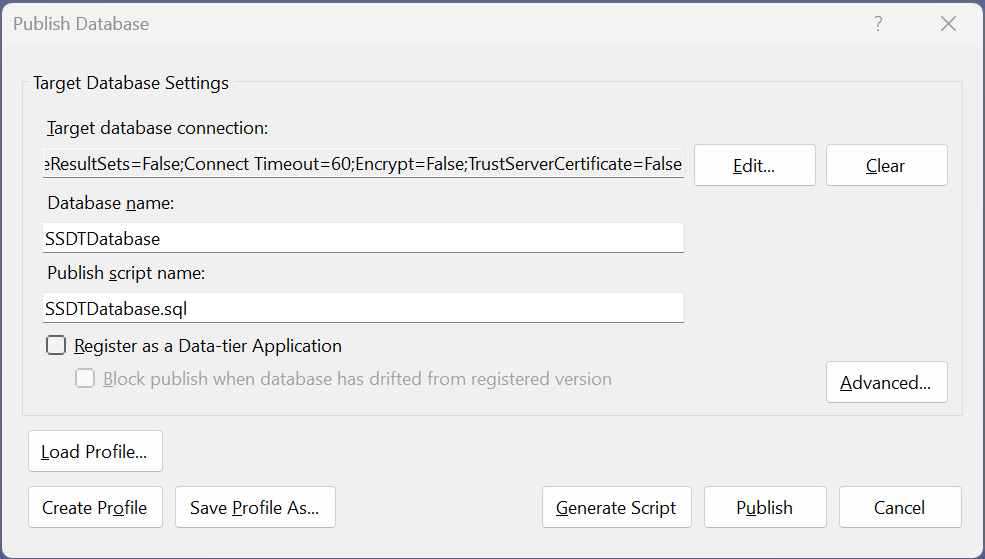
- Click OK and return to the Publish Database window
- In the publish database window, the Database name has been removed
- Since the project name (SSDTDatabase) is the default, we will use it for the Database name
- For Database name: enter SSDTDatabase
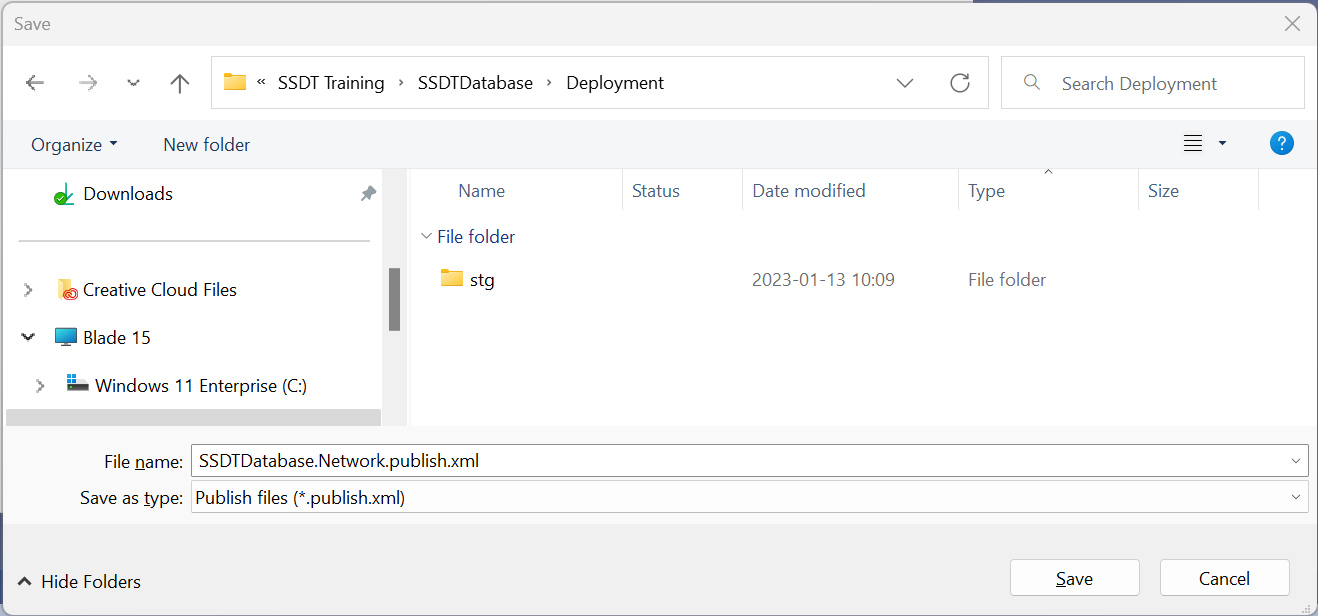
- Click Save Profile As… this will save time when Advanced settings are changed
- Navigate to your Deployment folder in the project
- It should be nested under the Solution (SSDT Training) > Project (SSDTDatabase) > Folder (Deployment)
- Change the name to SSDTDatabase.Network.publish.xml
- Click Save
- The new new publish settings will appear in the Solution Explorer
- Click Generate Script
Expert Tip: publish scripts have the compound extension .publish.xml
Resolve Mismatched SQL Server Versions
You may get an error in Data Tools Operations pane (my emphasis because the server versions may be different in your environment):
A project which specifies SQL Server 2016 as the target platform cannot be published to Microsoft Azure SQL Database v12.
- Set the Project Properties > Project Settings > Target Platform to your SQL Server instance
- On my network I’m using the developer edition of SQL Sever 2017.

Tip: Deployment to different SQL Servers is easier when they are the same version.
Tip: The IDE panes can be arranged to your preference.
Tip: Missing IDE panes can be found under Menu > View or Menu > View > Other Windows
- Double click SSDTDatabase.Network.publish.xml
- Verify the settings are correct
- Click Generate Script
Publish from the Output Script
Review of the Script Elements
When clicking Generate Script is a success, a script is created.. We’ll note the most important elements:
① Current Database – [master] is ok
② SQLCMD mode – The script must be run in SQLCMD mode
③ :setvar DatabaseName “SSDTDatabase”
④ Verify SQLCMD mode is enabled
⑤ Drop the database if it exists
⑥ Create the database.. and further more DDL commands.
⑦ SQL Server Connection
Items ①, ②, and ⑦ show the SQL Server, Database connection, and SQLCMD mode. SQLCMD mode isverified on in section ④.
SQLCMD mode allows variables, they are set in item ③. The variables are then used by other statements in the script.
Section ⑤ checks to see if the database exists referencing the variable $(DatabaseName); if the database exists, then drop the database. We should probably change this behavior in the publish xml.
Section ⑥ creates the database specifying the file locations and collation.

Publish from the Script
Publish scripts contain commands to create, drop, and alter objects; add and remove properties; and insert and delete data. The generated scripts do their best to not lose any data and/or copy data as table structures change. Sometimes, developer intervention is necessary with large or complex refactoring steps.
To publish the database from the script:
- Review the script for surprises
- To run the script and deploy the database click Execute Script (ctrl-shift-e) in the top left
- Review the Messages (SSDT splits the code pane into T-SQL and Messages tabs) for any publish errors
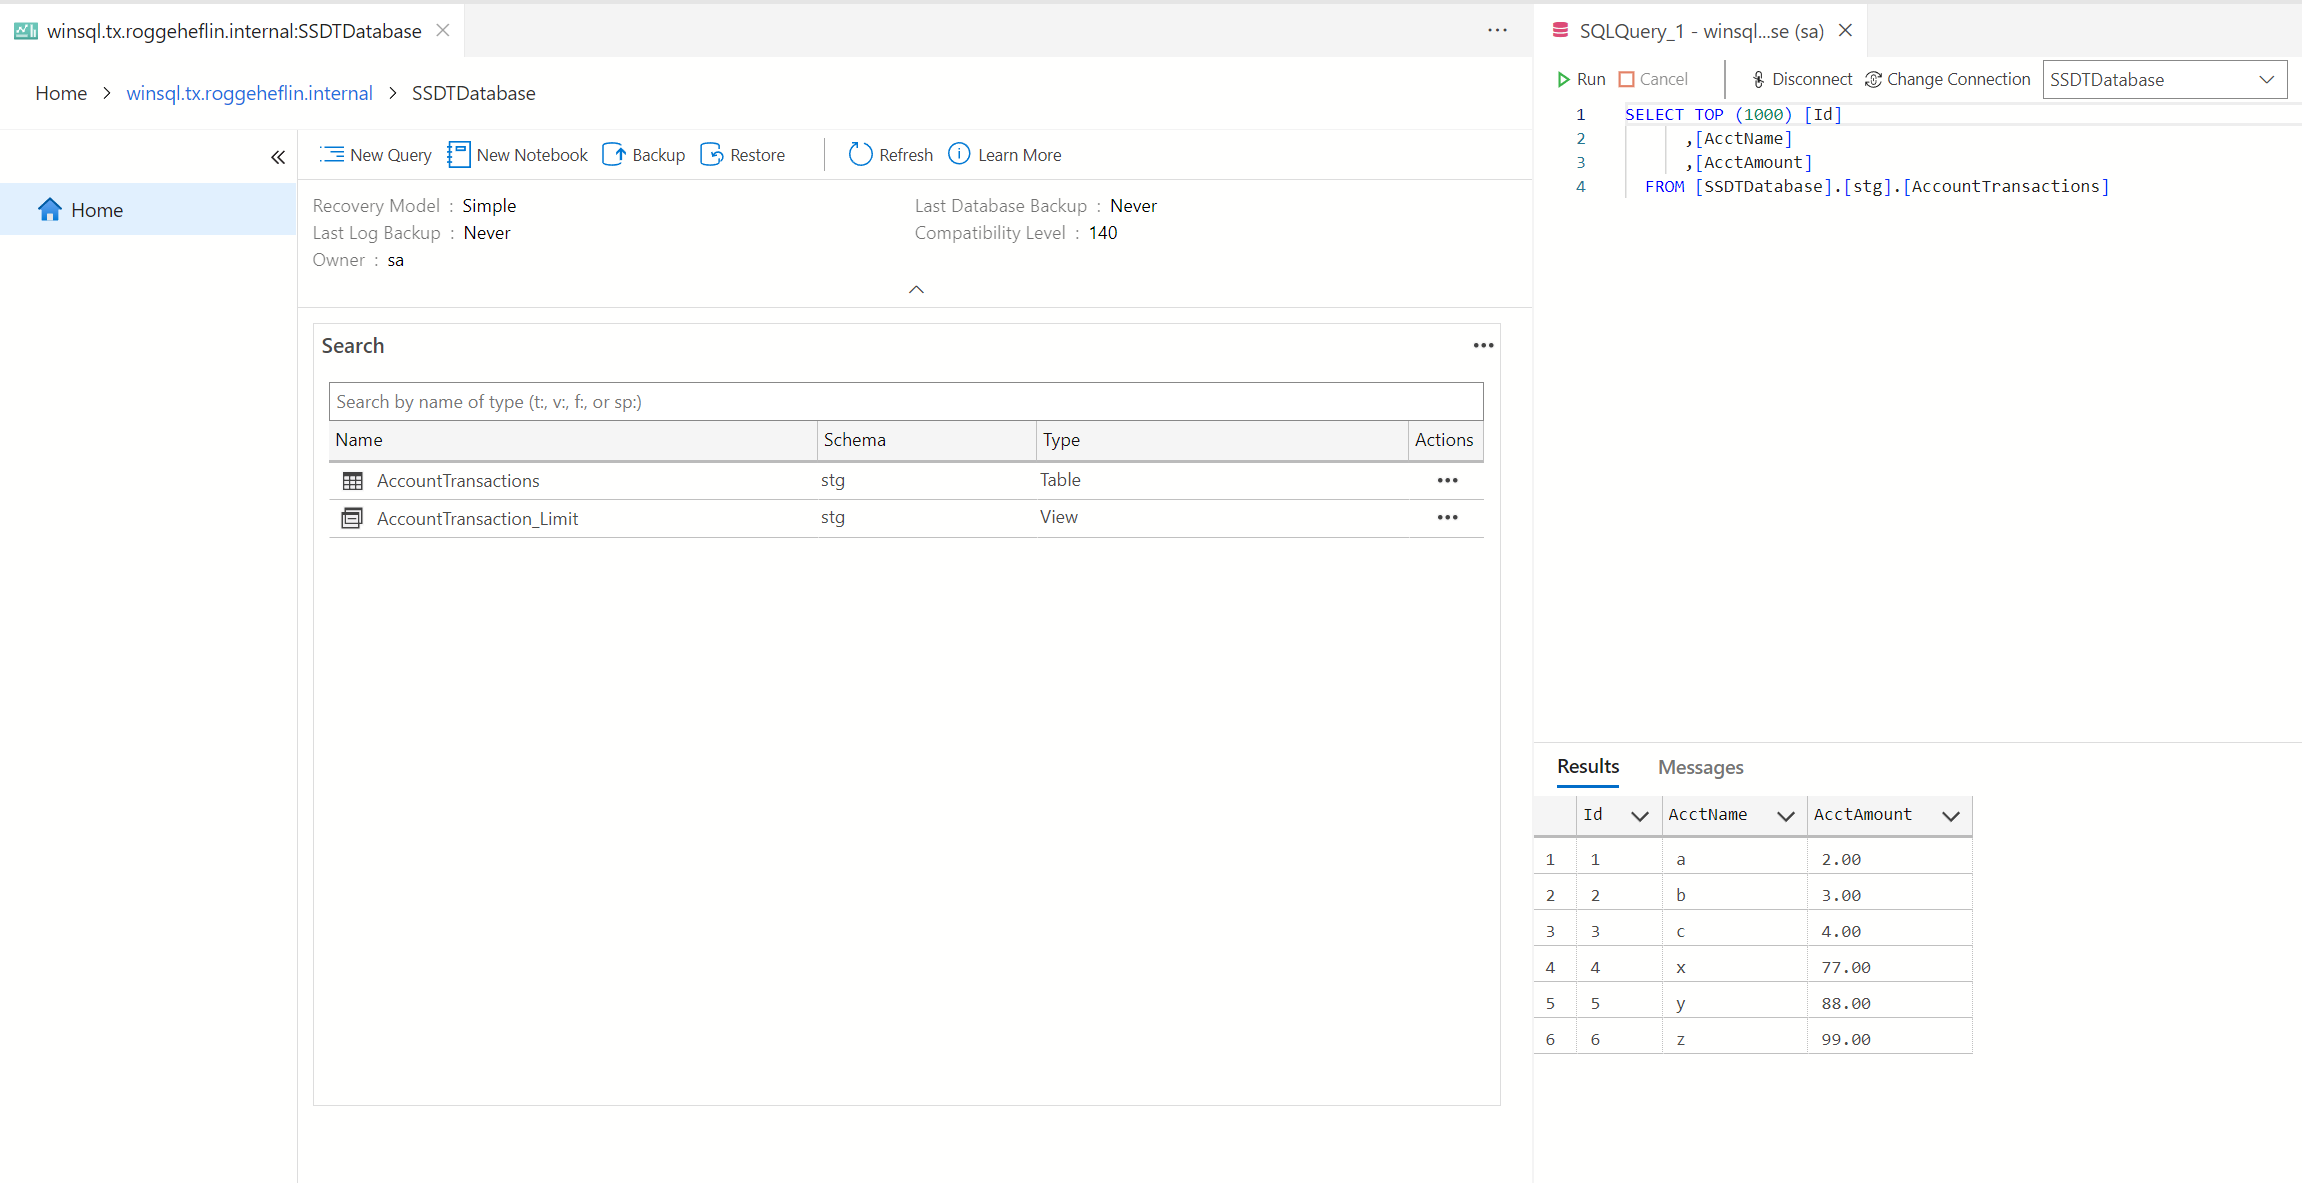
- Verify the database, objects, and data in a query tool of your choice. I am using Azure Data Studio in this example.
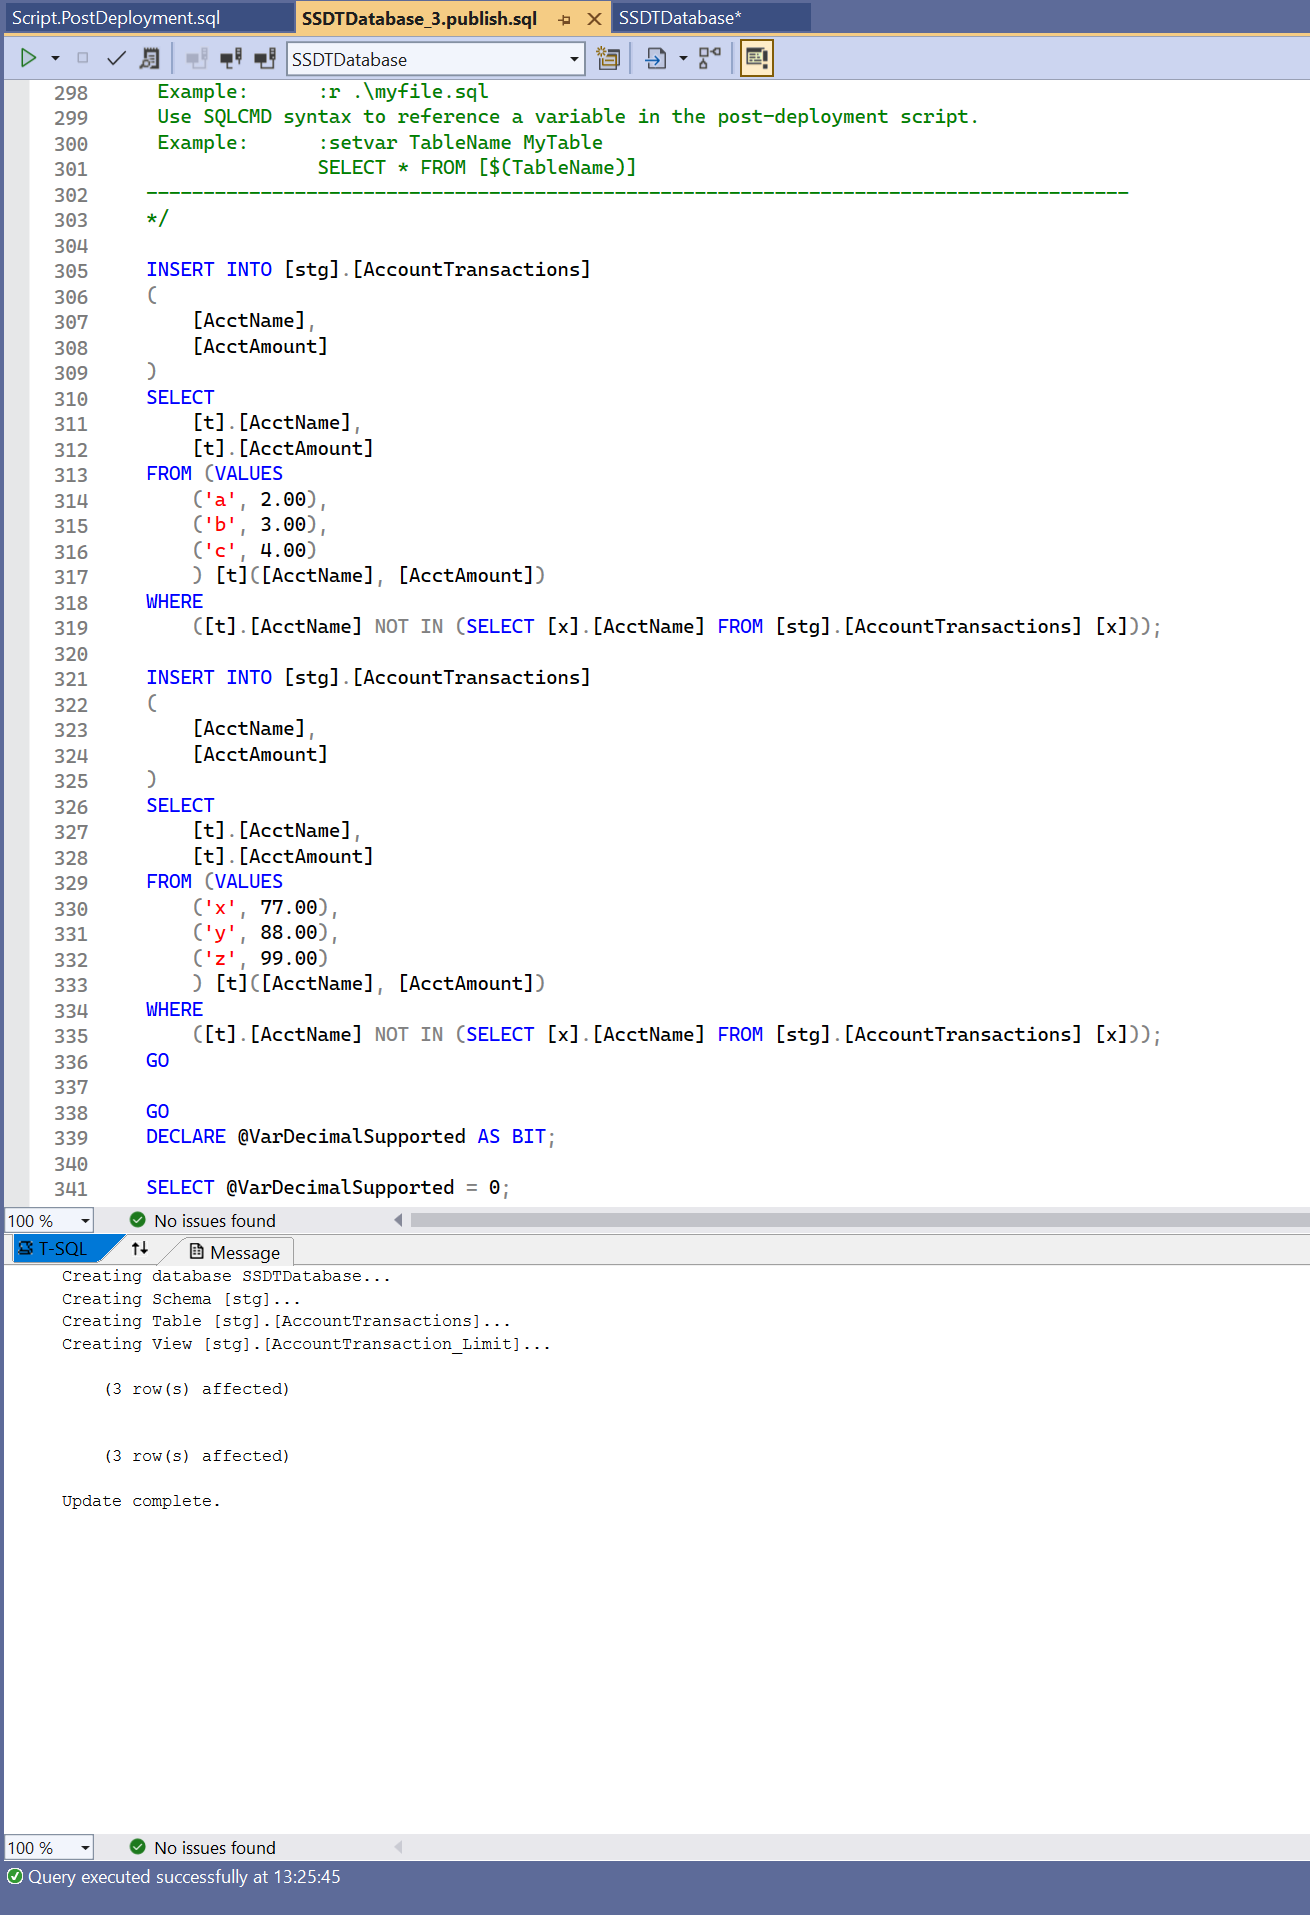
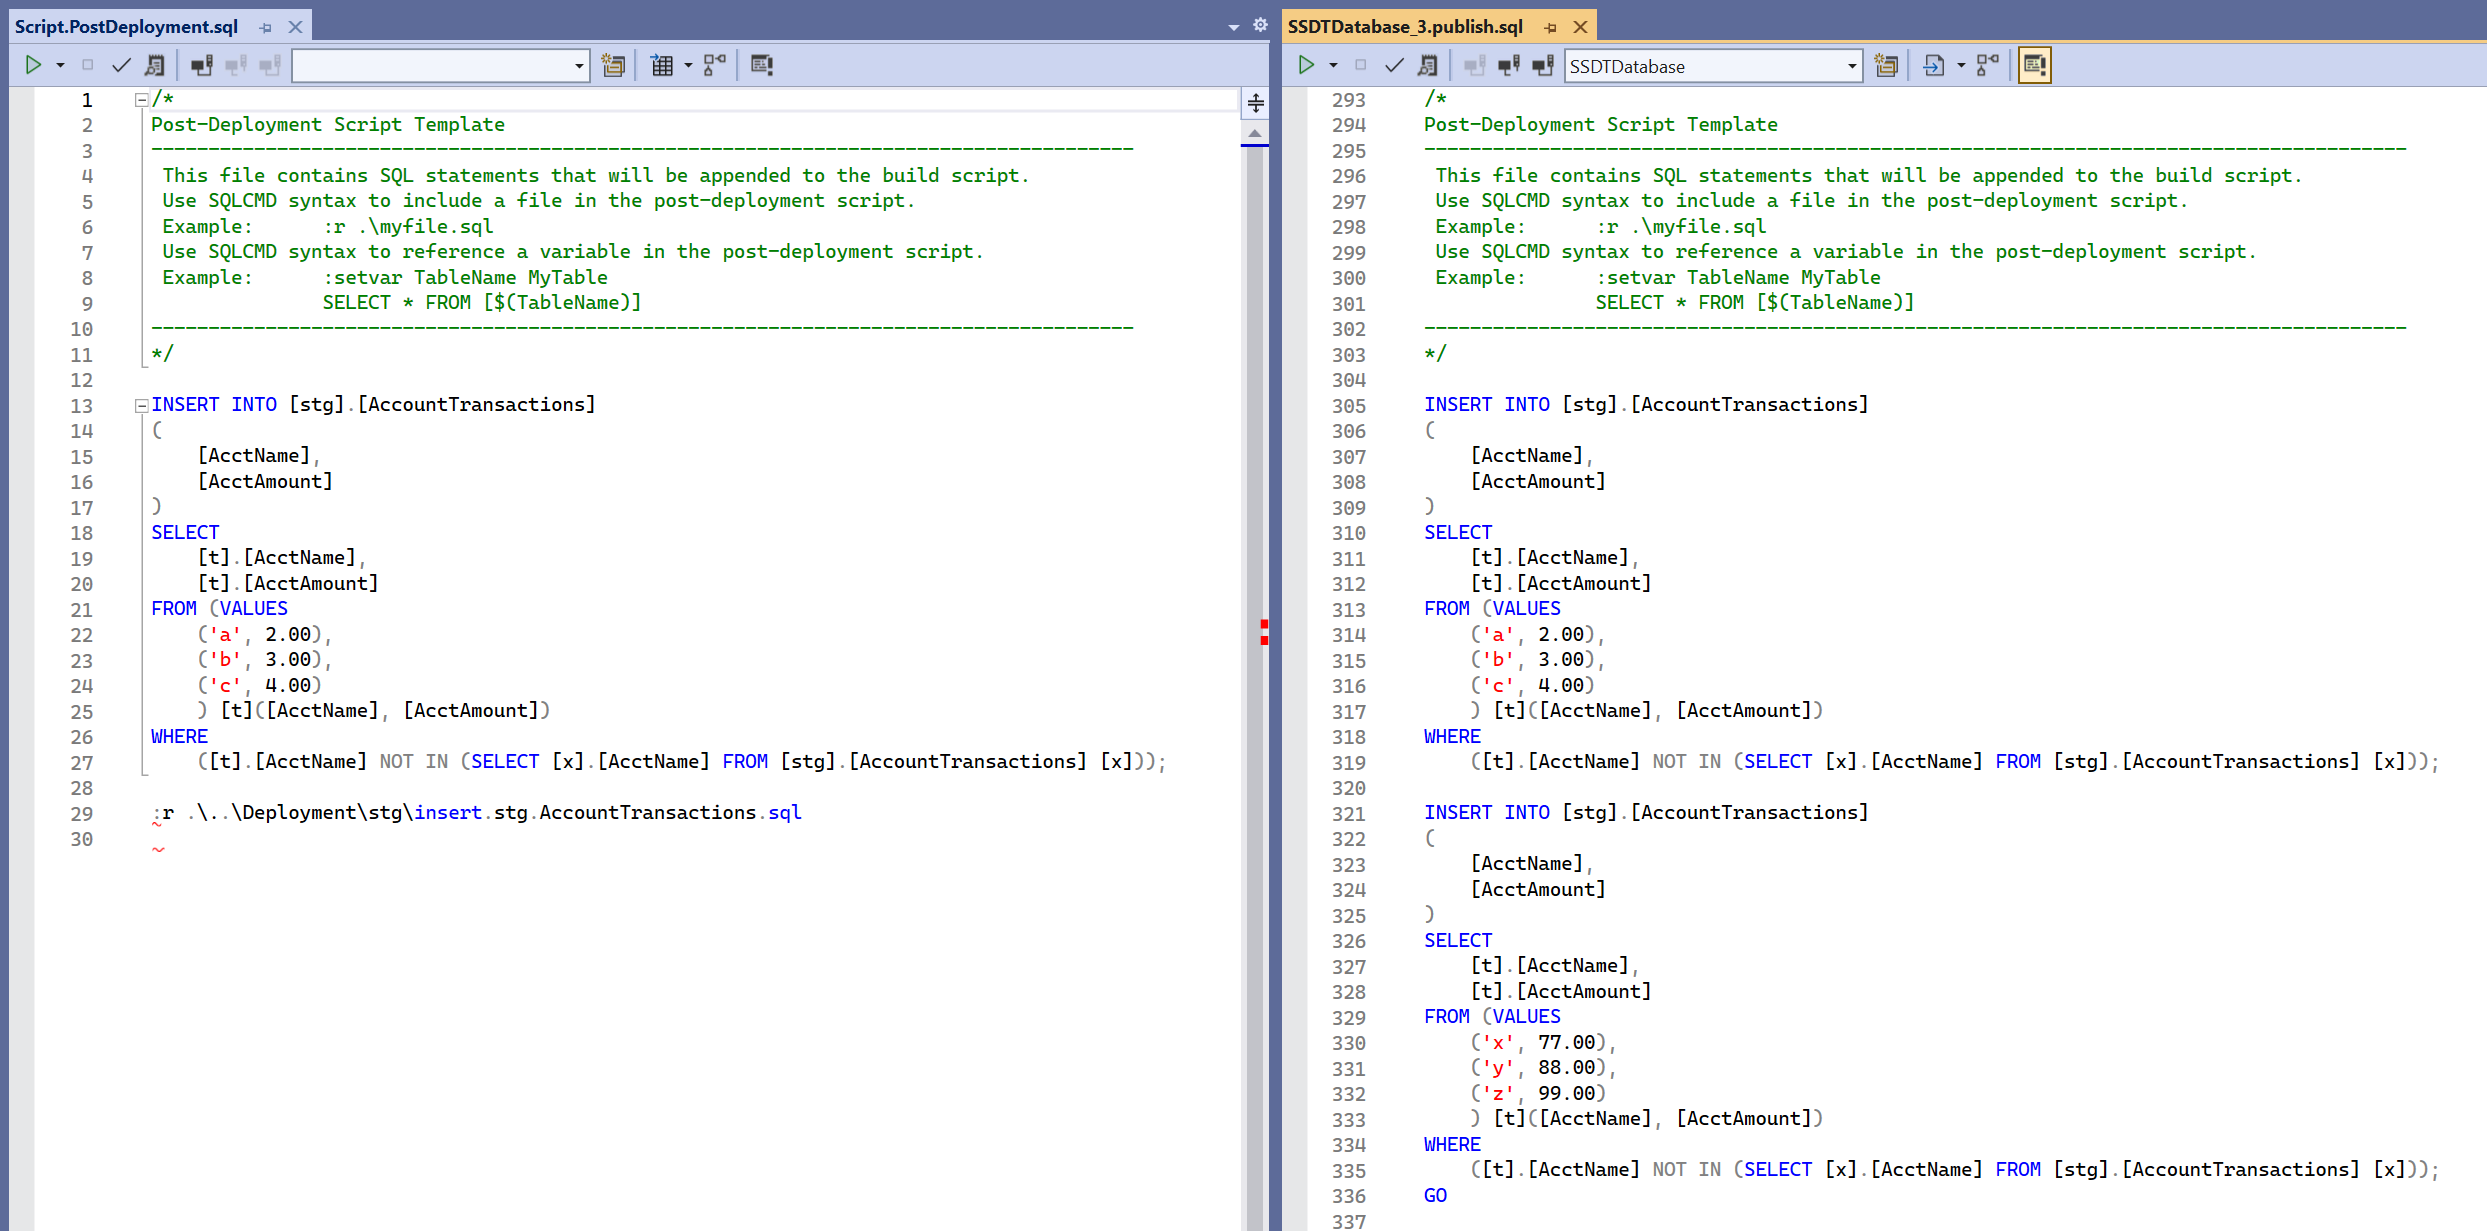
When writing Script.PostDeployment.sql, we included a line beginning with :r; the deployment script did not contain that line; SSDT replaced the line with the code from the referenced file:
Publish to Second SQL Server
This part is easy!
- Right click the project SSDTDatabase
- Click Publish…
- Click Edit…
- Select a different SQL Server, I’m selecting an empty database in Azure
- Click OK
- Click Save Profile As…
- Since this SQL Server is in Azure, name the profile SSDTDatabase.Azure.publish.xml
- The new new publish settings will appear in the Solution Explorer
- Click Generate Script
- Review the script
- Execute the script (ctrl-shift-e)
- Review results and the database in the new sql server
So after debugging, when the database project is ready for publishing, I can double click one of the .publish.xml files and make the changes on the target server.
