
I understand some experienced developers use SSMS and are unfamiliar with SSDT; to keep our focus, we will start with a new, empty solution and add a SQL Server Database Project and explore the configuration and features in the Database Project Properties post.
To get right into learning SSDT, scroll to Quick Start.
If you are new to Azure DevOps, Git, and want to learn CI/CD, follow the steps outlined in Preferred Practice.
Prerequisites
Verify:
- You can create/drop a database in a SQL Server
- Visual Studio is installed
- Data storage and Processing: SQL Server Data Tools workload is selected (see Getting Started, opens a new tab).
Quick Start
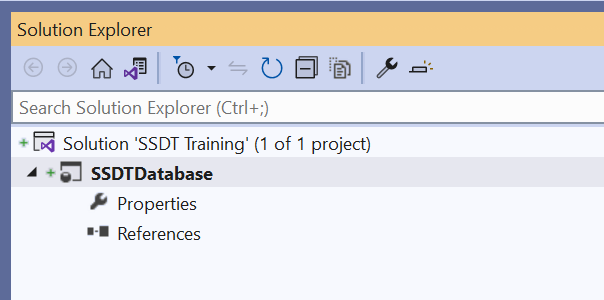
Create an Empty Solution
- Create an empty solution named SSDT Training
Create a SQL Server Database Project
- Navigate File > New > Project…
- Filter All Project Types to SQL
- Click Next

- Type Project name: SSDTDatabase – THIS WILL BE THE DEFAULT DATABASE NAME
- Solution: select Add to solution
- Location: selecting Add to solution will auto-populate with the solution path
- Solution name: selecting Add to solution will auto-populate with the solution name
- Click Create

- SSDTDatabase will appear in the solution.
Preferred Practice
As a preferred practice, immediately create a repository, then Pull/Push any code changes to/from Visual Studio.
The goal is to create a Git Repository in Azure DevOps to later use with CI/CD and Azure SQL Databases.
I typically use Team Foundation Version Control (TFVC) for personal projects, but SSDT CI/CD in Azure requires Git repositories. Here is a sparse guide to creating a Git repository and adding a Visual Studio Solution to the repo:
In Azure DevOps…
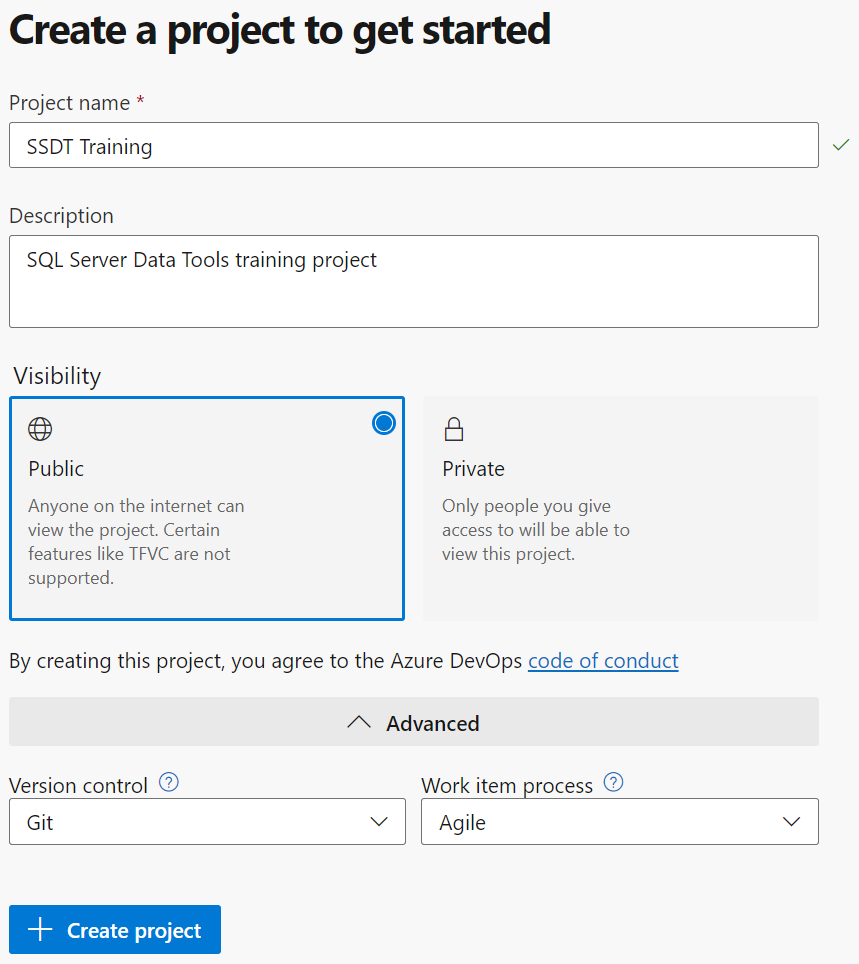
Create a project in Azure DevOps
- Project Name: SSDT Training
- Version control: Git
Initialize the main branch
- Navigate to SSDT Training > Repos > Files
- Add a README
- Add .gitignore and select VisualStudio
- Click Initialize
In Visual Studio…
Connect Visual Studio to Project
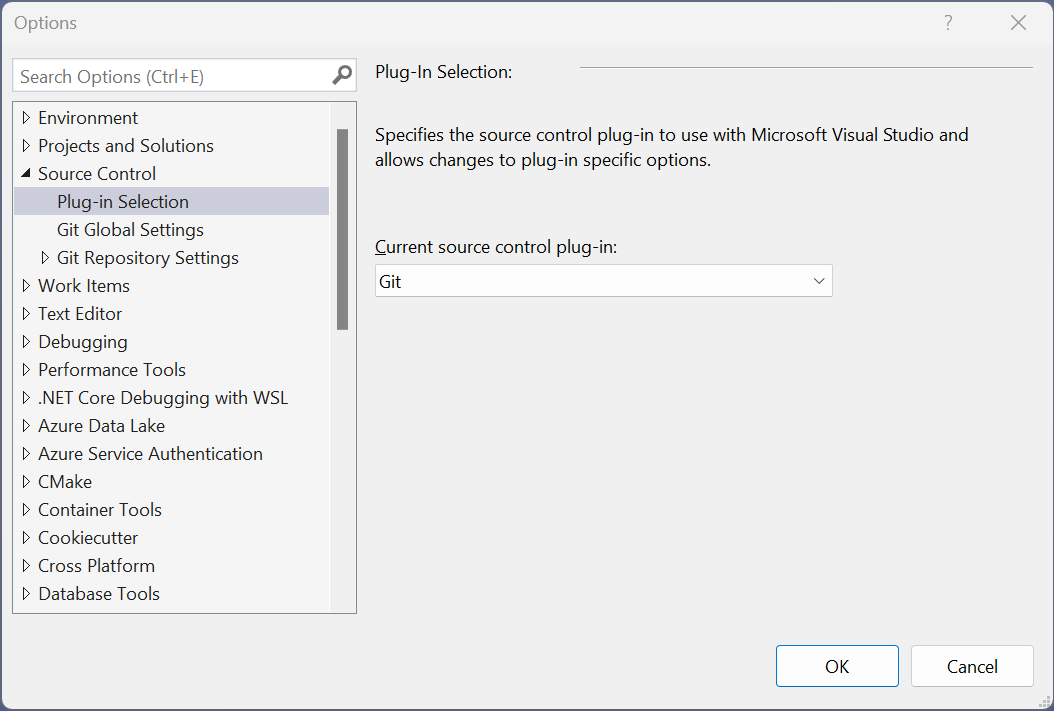
Verify Current Source Control plug-in is Git, starting in the menu bar:
Tools > Options… > Source Control > Plug-in Selection > Current source control plug-in: Git
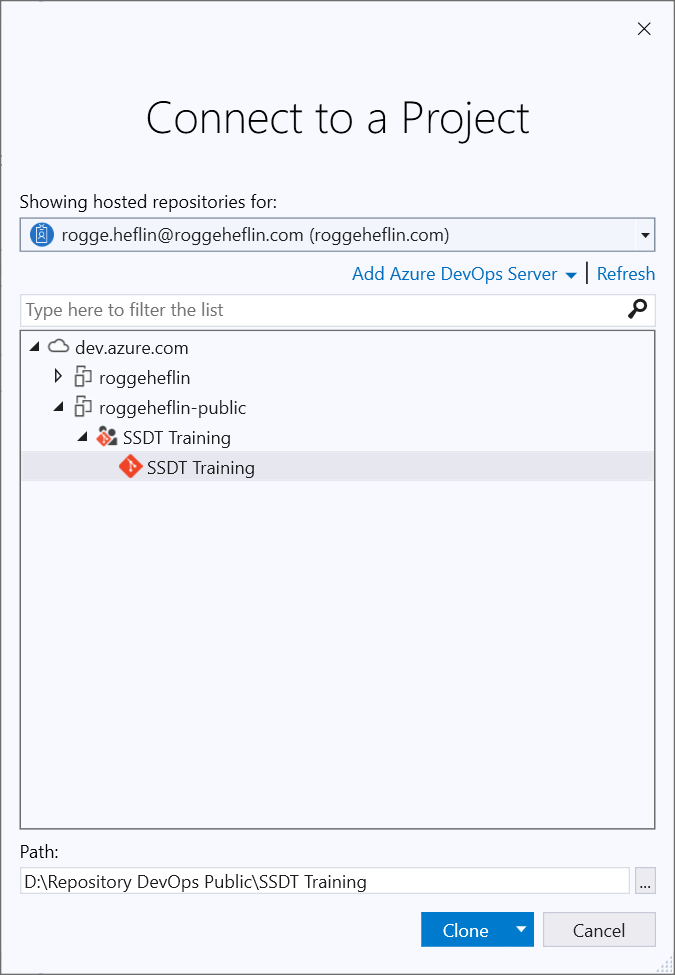
Clone Repository
- Select View > Git Changes
- Click Clone Repository…
- Click Azure DevOps
- Navigate and select SSDT Training project
- Enter an appropriate path: D:\Repository DevOps Public\SSDT Training
- Click Clone
Create an Empty Solution
- Navigate and Select File > New Project
- Select Blank Solution
- Click Next
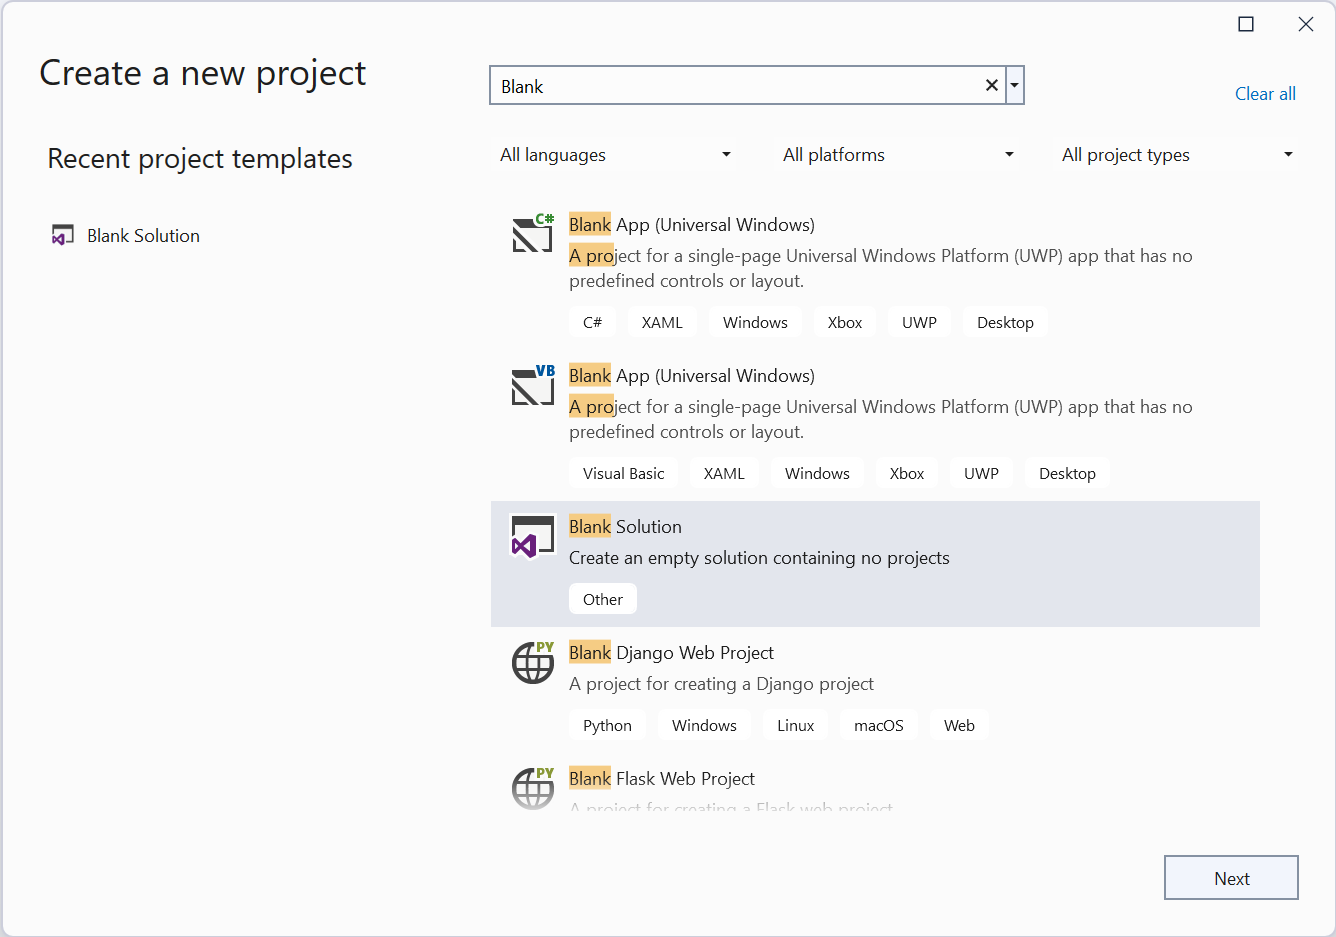
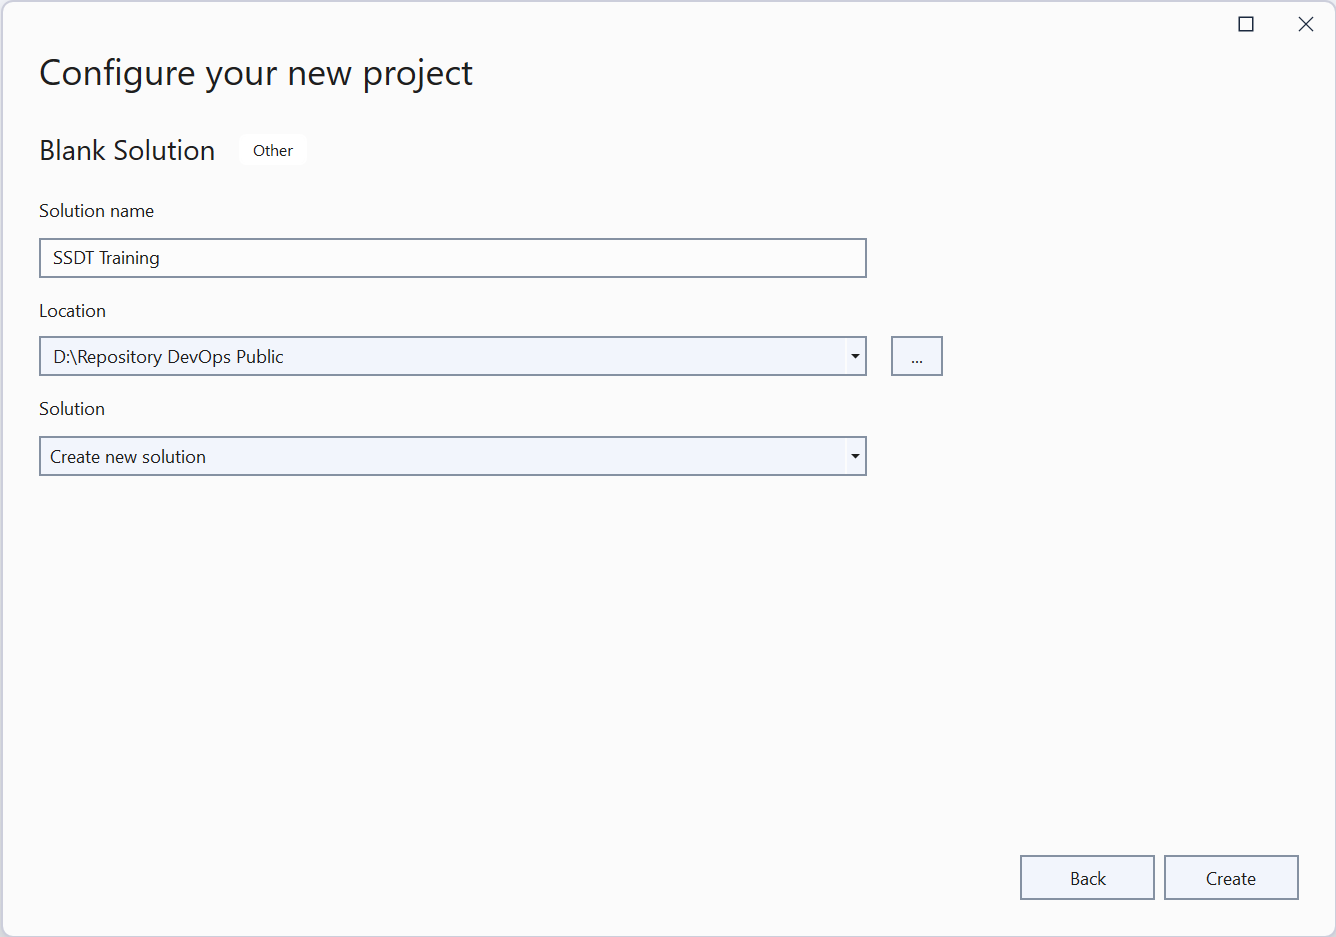
- Enter the solution name as the same as your Repository name: SSDT Training
- Select the location of the repository’s parent: D:\Repository DevOps Public\
- The solution file will be placed in the folder <location>\<Solution Name>
- Location is the repository path parent (i.e. no SSDT Training subfolder selected)
- Click Create
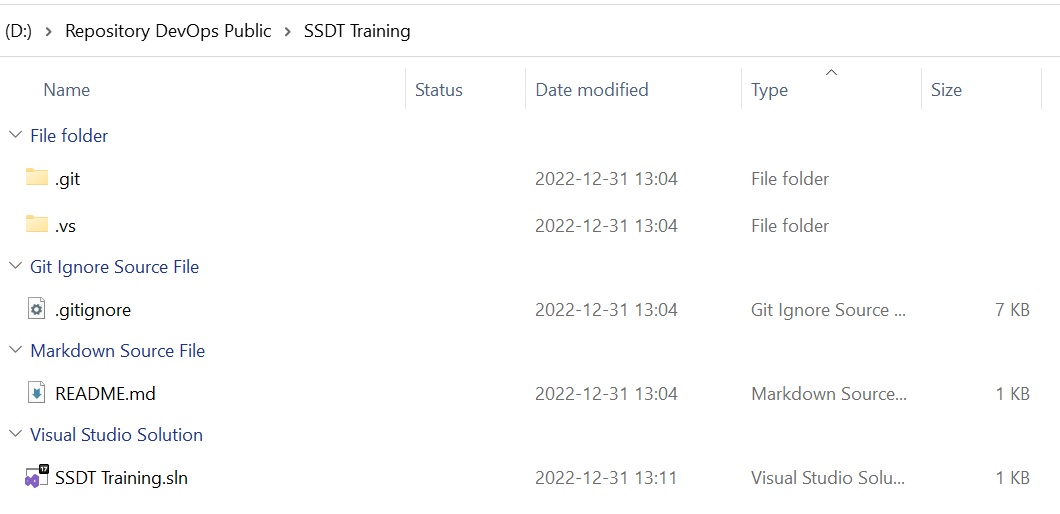
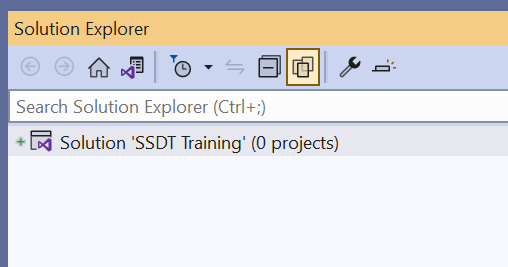
Note: SSDT Training.sln is created in the Project folder; Visual Studio nests the solution file in a folder of the same name. The initialization files, .gitignore and README.md, are still available, but do not appear in the Visual Studio Solution Folder.
Note: I like nesting the solution file in the top-most repository folder.
Create a SQL Server Database Project
Follow the instructions in Quick Start to Create a SQL Server Database Project.
